Your viscometer readings are untrustworthy, leading to inconsistent products. This wastes money and damages your reputation. Proper calibration is the only way to ensure your measurements are accurate every time.
Calibrating a rotational viscometer involves using certified standard fluids at a controlled temperature. You measure the standard fluid, compare the reading to its known value, calculate the deviation, and adjust or document the results. This ensures your instrument's accuracy and reliability for quality control.
I remember a client from South America who called me in a panic. Their lotion batches were coming out completely different, even though the formula was the same. Their viscometer readings were all over the place. The problem? They hadn't calibrated their instrument in over two years. An instrument you can't trust is worse than no instrument at all. At Martests, we stress that calibration isn't an optional task; it's the foundation of quality control. Let's walk through the exact process we use in our own factory and recommend to all our clients.
Step 1: Identify Your Viscometer Type and Range?
Using the wrong calibration fluid wastes time and money. This mistake gives you a failed calibration before you even start. First, identify your viscometer model, range, and spindle type.
Check your viscometer's model number and consult the manufacturer's manual. This will specify its torque range (LV, RV, HA, HB) and measurement limits. This information is critical for selecting the correct spindles and certified standard fluids needed for an accurate calibration procedure.
Before you do anything else, you need to know exactly what machine you are working with. Every model has unique specifications, and treating them all the same is a recipe for failure.
Confirm the model and measurement range of your rotational viscometer
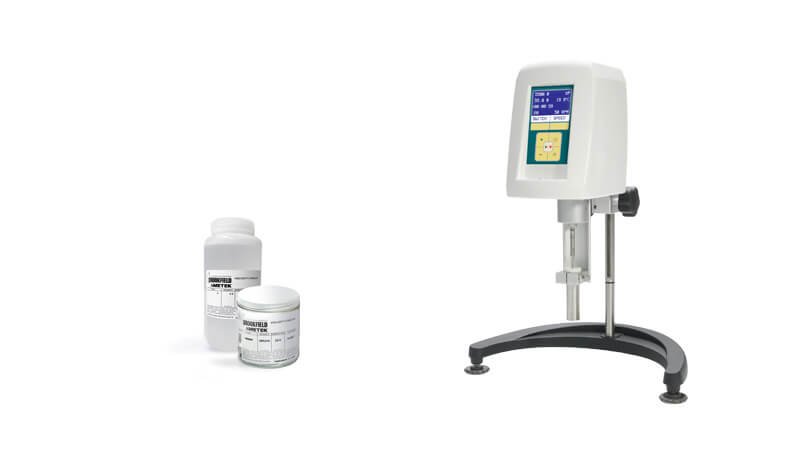
Look for a label on the back or bottom of your instrument. It will list the model number and its measurement capabilities. Our Martests viscometers, for example, have this clearly displayed. The range tells you the minimum and maximum viscosity it can accurately measure.
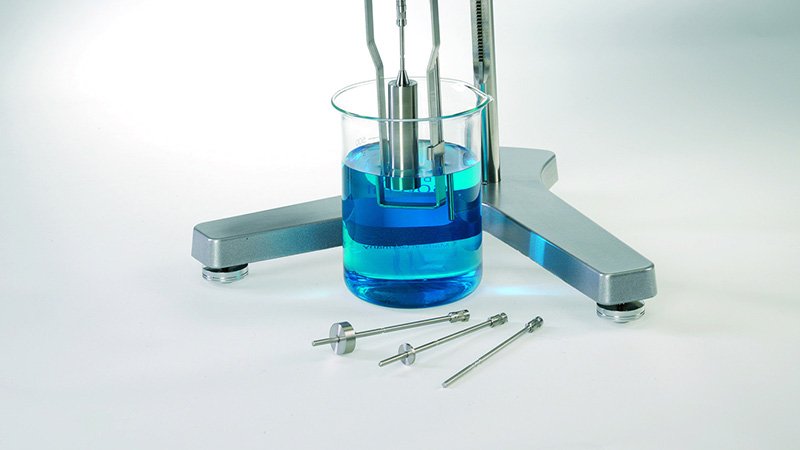
Check the spindle geometry and torque range
The torque range is often indicated by letters like LV (Low Viscosity) or RV (Regular Viscosity). This determines which spindle set you should use.
| Torque Type | Typical Viscosity Range | Common Applications |
|---|---|---|
| LV | Low (e.g., 1 - 2M cP) | Inks, oils, solvents |
| RV | Medium (e.g., 100 - 13M cP) | Creams, lotions, paints |
| HA/HB | High (e.g., 200 - 104M cP) | Pastes, gels, asphalt |
Using an RV spindle set on an LV instrument will not work and can damage the device.
Review the manufacturer’s manual for recommendations
Your manual is your best friend. It lists compatible standard fluids and recommended calibration intervals. A key tip I always share with customers: Always use calibration fluids whose viscosities fall within 10–90% of your instrument’s full-scale range. This ensures you're testing in the "sweet spot" of the instrument's accuracy.
Step 2: Gather Certified Calibration Standards?
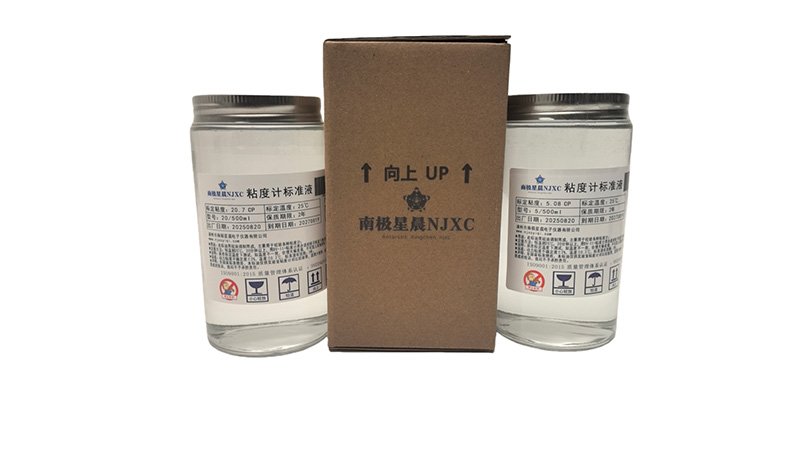
Using old or uncertified standard fluids makes your calibration useless. This invalidates all future measurements and your quality control data. Always use certified, unexpired, NIST-traceable standards for valid results.
Select NIST-traceable standard viscosity fluids with known values at a specific temperature (e.g., 25°C). Check that the fluid's certificate is valid and not expired. Store them tightly sealed and away from heat and light to maintain their integrity until you are ready to use them.
The quality of your calibration depends entirely on the quality of your standard fluid. You cannot compromise here. This is an area where cutting corners will always cost you more in the long run.
Use NIST-traceable standard viscosity fluids
"NIST-traceable" means the fluid's viscosity was certified using equipment that has been calibrated against standards from the National Institute of Standards and Technology (NIST) in the US. This creates an unbroken chain of accuracy. It's the gold standard for any serious lab. I tell clients like Jacky in Italy that this traceability is non-negotiable if they want to sell to discerning markets. Silicone oil-based standards are common because they're stable, non-toxic, and don't evaporate easily, ensuring the viscosity remains constant.
Store fluids properly
These fluids are sensitive. Store them in their original containers, tightly sealed. Keep them in a dark cabinet at room temperature. Exposure to sunlight, extreme heat, or contamination from dust will change their viscosity and make them useless.
Ensure each standard fluid’s certificate of calibration is valid
Every bottle of standard fluid comes with a certificate. This document lists its exact viscosity at specific temperatures and has an expiration date. Once it expires, you cannot trust its value. Always check the date before you begin.
Step 3: Prepare the Instrument and Accessories?
A dirty spindle or wobbly instrument will ruin your calibration. These simple mistakes introduce errors and force you to start over. Always clean your accessories and level your viscometer first.
Start by thoroughly cleaning the spindle and sample container to remove any residue. Inspect them for scratches. Place the viscometer on a level, vibration-free surface and adjust the leveling bubble. Finally, power on the device to allow its electronics to stabilize before you begin testing.
A clean and stable setup is fundamental. Think of it as a chef preparing their station before service. The little details you take care of now will make a big difference in your final result.
Clean the spindle and sample container thoroughly
Any leftover residue from a previous test will contaminate your standard fluid and alter the viscosity reading. Use a lint-free cloth and a solvent that can dissolve the previous sample but won't damage the spindle. For our Martests spindles, we provide specific cleaning protocols. Always dry the parts completely before use.
Inspect for scratches or residue
A spindle is a precision tool. A scratch, dent, or even a stubborn bit of dried sample can disrupt the fluid flow around it. This changes the torque reading and makes your measurement inaccurate. If you see any damage, the spindle should be replaced.
Level the viscometer base and ensure it’s placed on a stable, vibration-free surface
All rotational viscometers have leveling feet and a bubble level. If the instrument is not level, the spindle will not rotate perfectly vertically. This puts extra drag on the motor and will result in a falsely high viscosity reading. It must be on a solid bench, away from vibrating equipment like centrifuges or mixers.
Power on the device and let it warm up
Let the viscometer warm up for at least 15-30 minutes. This allows the internal electronics and motor to reach a stable operating temperature, which ensures a consistent and reliable torque measurement.
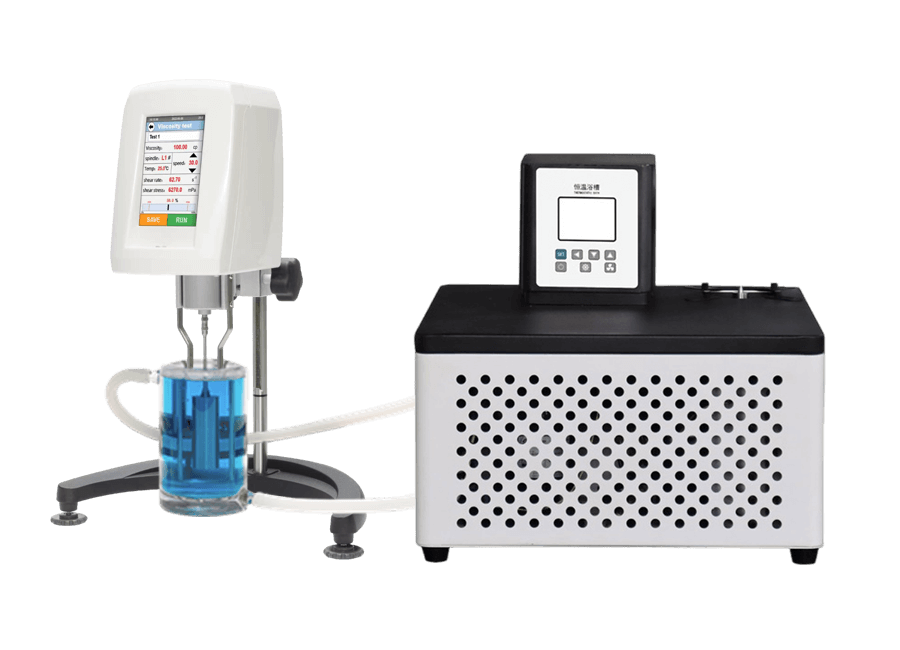
Step 4: Stabilize the Temperature?
Measuring viscosity without controlling the temperature is a critical error. A one-degree change can invalidate your entire calibration process. Always use a thermostatic bath to stabilize the fluid's temperature first.
Use a circulating water bath to bring the standard fluid to the precise temperature specified on its certificate, usually 25.0°C. Immerse the sample container in the bath and use a separate certified thermometer to confirm the fluid's temperature. Do not proceed until it is stable.
This is the most critical step, and the one people most often get wrong. Viscosity is extremely sensitive to temperature. Ignoring this step makes all your other work meaningless.
Since viscosity is temperature-dependent, accurate calibration requires strict temperature control
For most fluids, viscosity decreases as temperature increases. A standard fluid certified at 25.0°C will have a completely different viscosity at 26.0°C. If you don't control the temperature, you are comparing your viscometer's reading to a number that is no longer true. It's the most common source of error I see when I help customers troubleshoot their process.
Use a thermostatic bath or temperature control system
The only reliable way to do this is with a circulating water bath. This device holds your sample at a precise temperature, for example, 25.0°C ± 0.1°C. It's an essential piece of equipment for any serious lab.
Immerse a certified thermometer to confirm the actual temperature
Don't just trust the bath's display. Place a calibrated, certified thermometer directly into the standard fluid (or a separate sample of it in the bath) to verify the actual temperature.
Allow the standard fluid to reach thermal equilibrium before starting
Once you place the sample in the bath, wait. It can take 30 minutes or more for the fluid to reach a stable temperature all the way through. Be patient. Rushing this step will ruin your results.
Step 5: Conduct the Calibration Measurement?
Incorrect measurement technique introduces air bubbles and unstable readings. This skews your results and forces you to start over. Follow a precise procedure for a clean, stable measurement.
Attach the correct spindle and set the specified RPM. Carefully lower the spindle into the temperature-stabilized fluid to the immersion mark. Allow the reading to become stable, then record the measured viscosity. Repeat the measurement at least three times to ensure the result is repeatable.
Now you are ready to take the actual measurement. Precision and patience are key. Follow the same exact procedure every time to ensure your results are consistent and comparable.
Attach the correct spindle and set the rotational speed (RPM)
Your viscometer manual or the standard fluid's certificate will recommend the correct spindle and RPM combination to use. Selecting the right combination ensures your torque reading falls within the ideal range (usually 10-90%) for the most accurate measurement.
Lower the spindle into the fluid to the specified immersion mark, avoiding air bubbles
The spindle has a groove or mark on its shaft. You must lower it into the fluid until the surface of the liquid is exactly at this mark. Insert it at a slight angle to help prevent trapping air bubbles on the spindle's surface, as these will cause errors.
Wait until the torque reading stabilizes and record the measured viscosity
When you start the motor, the reading will fluctuate. You must wait for both the viscosity reading and the % torque reading to become steady. This might take 30 seconds or a few minutes. A fluctuating reading means the measurement is not yet valid.
Perform at least three replicate measurements to confirm repeatability
Don't just trust one measurement. Record the value, then stop and restart the measurement two more times. The three readings should be very close to each other. This confirms your technique is good and the result is repeatable. Use the average of these readings for your calculation.
Step 6: Compare and Calculate the Deviation?
You have a reading, but what does it mean? Without a clear calculation, you won't know if your instrument is accurate. Use a simple formula to find the deviation.
Compare your average measured viscosity to the certified value on the standard fluid's certificate. Use the formula: Deviation % = |(Measured - Standard) / Standard| × 100. If this percentage is outside the acceptable limit (typically ±1-2%), your viscometer needs adjustment or service.
This is the moment of truth. This simple calculation tells you if your instrument is performing as it should or if it needs attention. It turns a raw number into a clear pass/fail result.
Compare the measured viscosity values with the certified values
Look at the certificate of your standard fluid. It will state a value, for example, "98.5 cP at 25.0°C". Now look at the average of your three measured values from the previous step. Let's say your average was 99.2 cP.
Compute the percentage deviation
The formula is straightforward and gives you a clear metric.
Deviation (%) = |Measured Value - Standard Value| / Standard Value × 100
Using our example:
Deviation (%) = |99.2 - 98.5| / 98.5 × 100
Deviation (%) = 0.7 / 98.5 × 100 = 0.71%
This tells you your instrument is reading 0.71% higher than the standard.
If deviation exceeds the allowable limit (commonly ±1–2%)
Most manufacturers, including us at Martests, specify an accuracy of ±1.0% of the full-scale range. For a calibration check, if the deviation is over ±2%, it's a clear sign of a problem. In our example, 0.71% is well within this limit, so the viscometer passes. If it were 3%, it would fail, indicating a need for professional service.
Step 7: Record, Adjust, and Schedule Future Calibrations?
You calibrated your viscometer but didn't write it down. Without records, you have no proof for audits and no way to track instrument health. Always document everything and schedule the next calibration.
Document everything in a calibration log: date, operator, standard fluid details, temperature, and the final deviation. If the instrument passed, schedule the next calibration in 6-12 months. If it failed, arrange for professional service. This log is essential for traceability and quality audits.
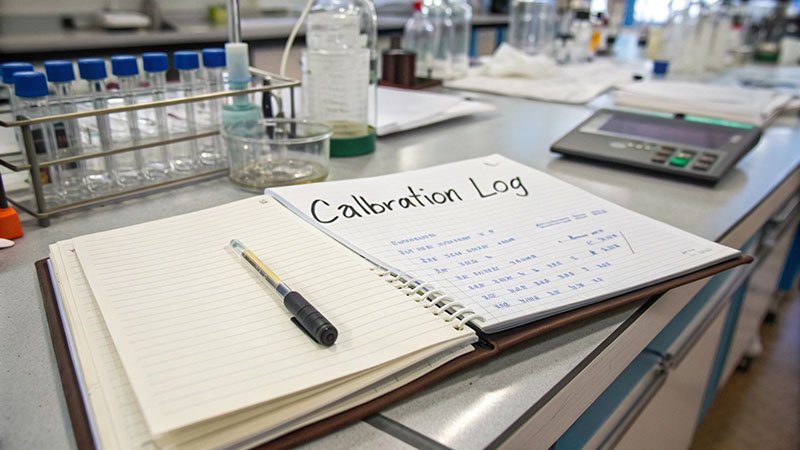
A calibration isn't finished until the paperwork is done. This final step ensures your hard work pays off in the long run by creating a traceable history of your instrument's performance.
Document all calibration details
This record is your proof of due diligence. For our B2B customers who undergo regular quality audits, this documentation is not optional—it's required. Your log should include the date, who performed the test, the standard fluid's type and batch number, the test temperature, all measured values, and the final calculated deviation.
If applicable, adjust the viscometer settings or apply a correction factor
Some advanced viscometers allow for minor user adjustments. However, if the deviation is significant, do not try to fix it yourself. This often requires a trained technician. Contact your supplier for servicing.
Establish a regular calibration schedule
How often should you calibrate? It depends on how much you use the instrument. For heavy daily use, every 6 months is a good idea. For lighter use, every 12 months might be sufficient. The key is to be consistent. Mark the next calibration date on your calendar and on a sticker on the instrument itself.
Best Practice: Keep a digital or paper calibration log for audits and traceability. A well-maintained log shows everyone, including your customers, that you are serious about quality.
Conclusion
Regular, documented calibration is not a task; it's a commitment to quality. Following these steps ensures your rotational viscometer provides the accurate, reliable data your business depends on.