
Are you struggling with inconsistent bitumen quality in your construction projects? Facing premature pavement failures or mixing issues? These problems often stem from improper viscosity control during production and application.
Bitumen viscosity testing follows standardized procedures including sample preparation, heating to specified temperatures, and measuring flow characteristics using specialized equipment like rotational viscometers or penetrometers. These tests determine if the bitumen meets required specifications for its intended application.
At Martests, I've noticed that understanding proper testing procedures isn't just about compliance—it directly impacts the quality and longevity of the final product. Let me share what I've learned about these essential testing procedures.
Why Is Viscosity Testing Important for Bitumen Quality Control?
Have your construction projects ever failed prematurely? Or have you struggled with inconsistent bitumen performance across different batches? These issues often trace back to inadequate viscosity testing during production.
Viscosity testing ensures bitumen has the right flow properties for proper mixing, coating, and compaction. It predicts performance under various temperatures and loading conditions, helping prevent early failures like rutting in hot weather or cracking in cold conditions.
I recently visited a highway construction site in Italy where our customer was experiencing inconsistent pavement quality. Upon investigation, we discovered significant variations in bitumen viscosity between batches. After implementing proper testing protocols using our viscometers, they achieved consistent mix designs and improved road durability.
The importance of viscosity testing extends beyond simple quality control. It affects every aspect of bitumen performance:
- Workability - Ensures the bitumen can be properly pumped, mixed, and applied
- Temperature Sensitivity - Predicts how the material will behave in different climate conditions
- Aging Resistance - Helps determine how the bitumen will perform over time
- Mix Design Optimization - Enables precise formulation of asphalt mixtures
For one of our clients in Germany, implementing comprehensive viscosity testing reduced material waste by 15% and extended pavement life by approximately 30%. These improvements came directly from better understanding and controlling bitumen flow properties.
What Equipment Is Required for Bitumen Viscosity Testing?
Wondering what tools you need to set up a proper bitumen testing laboratory? Confused about which equipment delivers the most reliable results? Let me clarify the essential testing apparatus.
Essential equipment includes rotational viscometers, vacuum capillary viscometers, penetrometers, softening point apparatus, and precise temperature control systems. Additional requirements include sample containers, timing devices, and calibration standards that comply with ASTM or EN specifications.
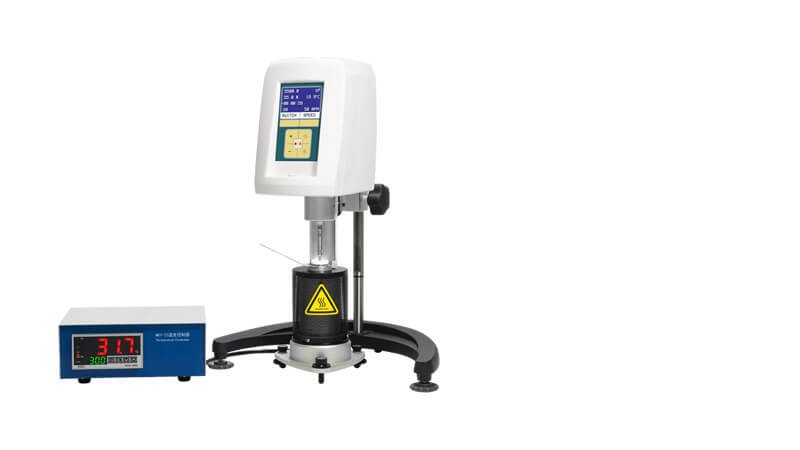
In our Martests production facility, we manufacture rotational viscometers specifically designed for bitumen testing. These instruments must meet strict international standards while remaining user-friendly and durable.
A complete bitumen testing laboratory typically includes:
Primary Testing Equipment
- Rotational Viscometer - For measuring viscosity across various temperatures
- Vacuum Capillary Viscometers - For absolute viscosity measurements
- Brookfield Viscometer - For high-temperature viscosity testing
- Penetrometer - For consistency testing
- Ring and Ball Apparatus - For softening point determination
Supporting Equipment
- Temperature-Controlled Baths - For maintaining precise test temperatures
- Sample Preparation Tools - For proper specimen handling
- Calibration Standards - For ensuring equipment accuracy
- Data Recording Systems - For documentation and analysis
I remember visiting a new asphalt plant in Spain that had invested heavily in production equipment but skimped on testing apparatus. They experienced significant quality issues until they upgraded their laboratory with proper viscosity testing equipment. The investment paid for itself within months through reduced waste and fewer customer complaints.
How to Perform Saybolt Viscosity Test for Bitumen?
Feeling uncertain about the correct procedure for Saybolt viscosity testing? Concerned about getting accurate results? Follow this step-by-step guide based on my experience working with hundreds of testing laboratories.
To perform a Saybolt viscosity test: 1) Preheat the bath to the specified temperature, 2) Prepare and filter the bitumen sample, 3) Place the sample in the Saybolt viscometer, 4) Allow temperature equilibration, 5) Remove the cork and measure the time for 60ml to flow through the orifice, and 6) Record the result in Saybolt Seconds.

At Martests, we've trained numerous technicians on proper testing procedures. The Saybolt viscosity test, while seemingly simple, requires careful attention to detail for accurate results.
Let me walk you through the detailed procedure:
Preparation Phase
- Equipment Check - Ensure the Saybolt viscometer is clean and the orifice is unobstructed
- Bath Preparation - Fill the bath with an appropriate medium (usually water or oil) and set to the test temperature
- Sample Preparation - Heat the bitumen sample to make it fluid, then filter through a 75-micron sieve to remove contaminants
Testing Phase
- Loading the Sample - Pour the prepared bitumen into the Saybolt viscometer chamber
- Temperature Equilibration - Allow the sample to reach thermal equilibrium (typically 30 minutes)
- Cork Placement - Place the cork in the orifice while the sample equilibrates
- Flow Measurement - Remove the cork and immediately start timing
- Collection - Measure the time required for 60ml of bitumen to flow into the receiving flask
- Recording - Document the result as Saybolt Furol Seconds (SFS) or Saybolt Universal Seconds (SUS)
Quality Control Considerations
- Temperature Control - Even small temperature variations can significantly affect results
- Timing Precision - Use calibrated timing devices for accurate measurements
- Cleanliness - Any contamination can alter flow characteristics
- Repeatability - Perform multiple tests to ensure consistent results
Last year, I helped a Middle Eastern client troubleshoot inconsistent test results. We discovered their water bath temperature was fluctuating due to ambient conditions. After implementing better temperature controls, their test repeatability improved dramatically.
What Are the Different Methods Used for Testing Bitumen Viscosity?
Confused about which viscosity test method is right for your specific application? Wondering how international standards compare? Let me explain the key methods used worldwide.
Common bitumen viscosity testing methods include rotational viscometry (ASTM D4402), kinematic viscosity (ASTM D2170), absolute viscosity (ASTM D2171), Saybolt viscosity (ASTM D88), and penetration testing (ASTM D5). Each method serves specific purposes and applies to different temperature ranges and conditions.

Through my work at Martests, I've supplied equipment for all major testing methods to clients across Europe, Asia, and the Middle East. Each method has distinct advantages for specific applications.
Key Testing Methods and Their Applications
1. Rotational Viscometry
- Standard: ASTM D4402/AASHTO T316
- Equipment: Rotational viscometer with temperature control
- Temperature Range: Typically 135°C and 165°C
- Best For: Performance-graded binders, quality control during production
- Advantages: Measures across a wide range of temperatures and shear rates
2. Kinematic Viscosity
- Standard: ASTM D2170/AASHTO T201
- Equipment: Glass capillary viscometers
- Temperature Range: Usually 60°C and 135°C
- Best For: Classification of bitumen grades
- Advantages: High precision for liquid bitumen
3. Absolute Viscosity
- Standard: ASTM D2171/AASHTO T202
- Equipment: Vacuum capillary viscometers
- Temperature Range: Typically 60°C
- Best For: Specification compliance testing
- Advantages: Provides fundamental flow properties data
4. Penetration Test
- Standard: ASTM D5/AASHTO T49
- Equipment: Penetrometer
- Temperature Range: 25°C standard
- Best For: Consistency classification
- Advantages: Simple procedure, widely used historically
5. Softening Point (Ring and Ball)
- Standard: ASTM D36/AASHTO T53
- Equipment: Ring and ball apparatus
- Best For: Determining temperature sensitivity
- Advantages: Simple indicator of behavior at elevated temperatures
A construction materials supplier in Southeast Asia recently asked me which method they should implement. After understanding their specific needs—primarily quality control for road construction—we recommended rotational viscometry as it provided the most relevant data for their applications while offering good repeatability and relatively simple operation.
Conclusion
Proper bitumen viscosity testing is essential for quality control and performance prediction. By selecting the right equipment and following standardized procedures, you can ensure your bitumen meets specifications and performs reliably in the field.