Viscosity seems like a complex scientific term, making it hard to discuss product texture or quality. This creates a gap between what you see and what the lab reports.
Viscosity is just a fluid's resistance to flowing, or its "thickness." You can see this by pouring honey and water side-by-side. The honey flows slower because it has a higher viscosity. These simple visual tests help you understand this key property.
My name is Stefan Wang, and I own Martests, a factory making high-quality viscometers. I believe that understanding viscosity shouldn't require a science degree. It starts with what you can see with your own eyes. Once you can see the difference, you can begin to understand why measuring it precisely is so important for your business. In this guide, I will show you some simple ways to see viscosity in action. Let's make this complex topic simple and practical.
Why does viscosity matter in everyday life and industry?
You might think viscosity is only for scientists in a lab. This thinking disconnects you from a key factor that affects your product's success and your customer's experience.
Viscosity is crucial because it defines how products perform their job. It determines the spreadability of paint, the texture of a cosmetic lotion, and the pumpability of industrial adhesives. Controlling it ensures quality and function.
Viscosity is all around us. Think about the food industry. The thick, slow-flowing viscosity of ketchup is what keeps it on your fries instead of making them soggy. In cosmetics, the viscosity of a face cream determines if it feels rich and luxurious or thin and watery. For industrial applications, it's even more critical. A purchasing manager for an automotive supplier needs to know the exact viscosity of a sealant to ensure it can be pumped by their robotic applicators without clogging the lines. I once worked with a client in the pharmaceutical industry. They needed to produce a cough syrup with a very specific viscosity. Too thin, and it felt ineffective. Too thick, and it was difficult to pour and dose correctly. By using one of our viscometers to standardize their batches, they achieved a consistent product that customers trusted.
| Industry | Why Viscosity Matters |
|---|---|
| Food & Beverage | Controls texture, mouthfeel, and stability (e.g., sauces, yogurts). |
| Cosmetics | Defines feel, application, and how a product sits on the skin. |
| Paints & Coatings | Prevents dripping, ensures even coverage, and controls drying. |
| Adhesives | Determines bonding strength and application method (e.g., spraying vs. spreading). |
Understanding Viscosity: The basic definition explained simply?
Not all "thick" liquids behave in the same way. This can be very confusing when a product seems fine one moment and then acts completely different the next.
Fluids are either Newtonian or non-Newtonian. Newtonian fluids, like water and oil, have a constant viscosity. Non-Newtonian fluids, like ketchup or paint, change their viscosity when you stir or shake them.
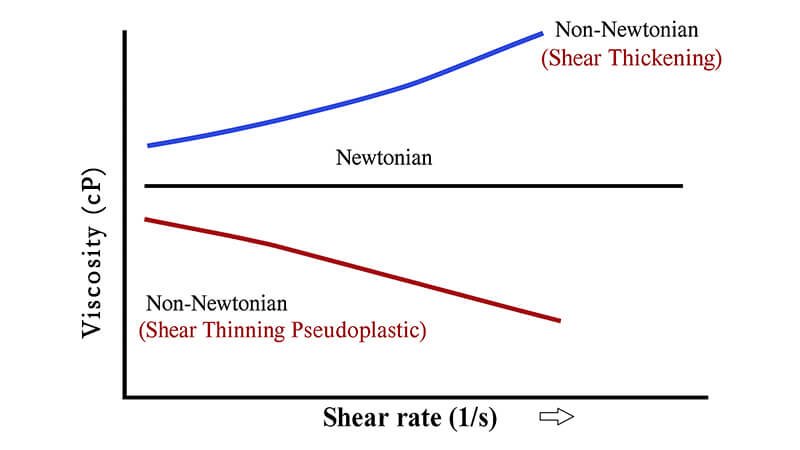
This is one of the most important concepts to understand. A Newtonian fluid is simple. Its viscosity stays the same no matter how fast you stir it. Water is a perfect example. It flows the same whether you pour it slowly or stir it quickly. Most oils and simple sugar solutions are also Newtonian.
A non-Newtonian fluid is more complex and interesting. Its viscosity changes based on the force, or shear, applied to it.
Shear-Thinning Fluids
These fluids get thinner when you stir or shake them. Ketchup is the classic example. It’s thick in the bottle, but when you shake it, it becomes much easier to pour. Paint is another one. It’s thick in the can to prevent settling, but it thins out under the force of a brush so it can be applied smoothly.
Shear-Thickening Fluids
These are less common but fascinating. They get thicker when you apply force. A mix of cornstarch and water (sometimes called oobleck) is the perfect example. If you punch it, it feels like a solid. But if you move your hand through it slowly, it feels like a liquid.
My customer Jacky in Italy sells a lot of paint. He knows his customers need a shear-thinning product. He uses our viscometers to check not just the viscosity at rest, but also how it changes at different rotational speeds to simulate brushing.
What are some easy ways to visually compare viscosity differences?
You don't have a viscometer handy at the moment. But you need a quick way to check if a new batch of raw material is different from the last one.
You can visually compare viscosity by pouring liquids side-by-side to see which flows faster. You can also watch how a drop forms and falls, or simply feel the resistance when stirring.

These quick tests are not a replacement for a precise measurement with a viscometer, but they are great for building your intuition and for a quick spot-check on the factory floor. Here are three simple methods you can use right now with items you already have.
1. The Pouring Race
Take two identical containers, like beakers or even just water glasses. Fill one with your reference liquid and the other with the new sample. Tilt both at the same angle at the same time and watch them pour. The liquid that reaches the finish line first has the lower viscosity. It's a simple race that tells a clear story.
2. The Droplet Test
Use a spoon or a dropper to pick up some of each liquid. Hold them over a surface and watch how the droplets form and fall. A low-viscosity liquid like water will form a drop and fall almost instantly. A higher-viscosity liquid like syrup will form a long, slow string before the drop finally separates.
3. The Stirring Resistance Test
This is the most direct method. Take the same stirring rod or spoon and stir each liquid. You will immediately feel the difference in force required. Stirring water takes almost no effort. Stirring oil takes a little more. Stirring honey requires significant force. This physical feedback is a direct experience of viscosity.
How can you demonstrate viscosity with videos and visual experiments?
Reading about viscosity is one thing, but seeing it in action makes the concept stick. Static words and pictures can't always show how fluids really behave under stress.
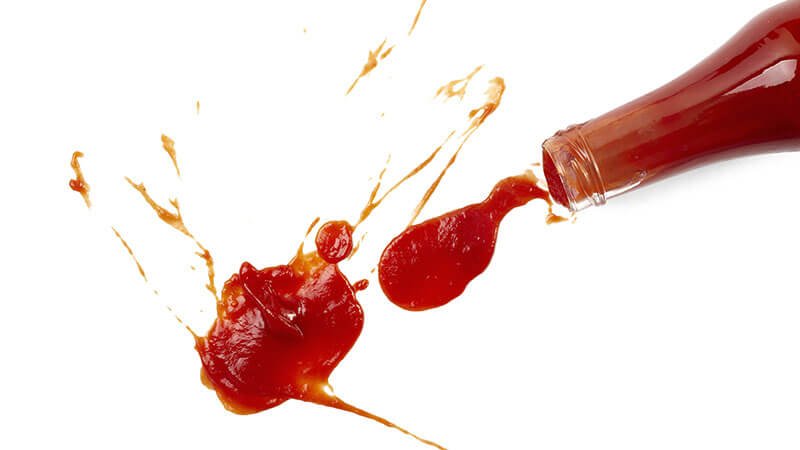
A great experiment is the "ketchup bottle test." A new bottle of ketchup is hard to pour (high viscosity at rest). But after you shake it, it flows easily (lower viscosity). This clearly shows non-Newtonian behavior.
Visual experiments are powerful because they make the abstract real. If you were making a short video to explain viscosity to your team, here are two great experiments to show.
Experiment 1: The Ketchup Effect (Shear-Thinning)
First, turn a new, unshaken bottle of ketchup upside down. Nothing happens. This demonstrates high viscosity when the fluid is at rest. It's resisting the force of gravity. Then, give the bottle a few good shakes and turn it upside down again. The ketchup now flows out easily. What should you point out? The shaking is the key. It applied force (shear) that broke down the internal structure of the ketchup, temporarily lowering its viscosity. This is exactly what happens when you brush paint.
Experiment 2: The Cornstarch Monster (Shear-Thickening)
Mix cornstarch with a small amount of water until it forms a thick paste. First, show someone slowly dipping their fingers into the mix. Their hand will sink in as if it's a liquid. Then, show them trying to punch the surface quickly. Their fist will not go in; the mixture becomes solid for a moment. This is a dramatic way to show a fluid getting thicker under stress. It’s a perfect visual to explain the opposite of the ketchup effect.
What is the challenge of mixing high-viscosity materials?
You need to mix a thick paste or gel. But your standard mixer just spins in the middle, leaving unmixed material stuck to the sides of the tank.
High-viscosity materials resist flowing, so they do not mix easily. A simple stirrer just creates a "cave" of air around the blade and fails to blend the whole batch. This requires specialized equipment.
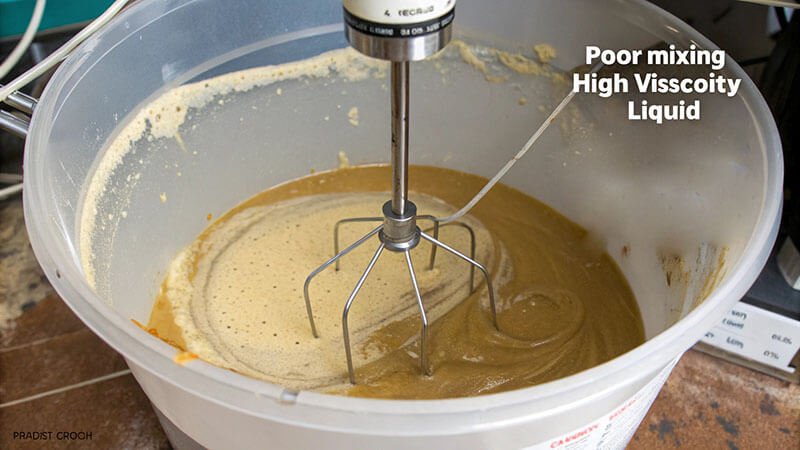
This is a huge problem in many industries, from making silicone sealants to producing thick cosmetic creams. The high internal friction of the material prevents it from moving toward the mixing blade. As a result, only the material right next to the blade gets mixed. The rest of the batch, near the walls of the tank, doesn't move at all. This leads to major quality issues like clumps of un-dissolved powder, uneven color, and inconsistent texture throughout the batch. To solve this, factories use specialized mixers. For example, a planetary mixer has blades that move around the tank in an orbit, like planets around the sun, while also spinning on their own axis. This forces the entire batch to be mixed. As a viscometer manufacturer, I know that after a company spends a lot of money on a powerful mixer, they need to verify that it actually worked. That is where our instruments come in. They take samples from different parts of the tank to confirm the viscosity is uniform everywhere.
What are some practical tips for measuring or estimating viscosity?
You are getting inconsistent viscosity readings from your instrument, and you can't figure out why. This makes you doubt your data and your quality control process.
For accurate viscosity measurements, always control the temperature. Use the same sample volume and container each time. And make sure there are no air bubbles in your sample before you start the measurement.
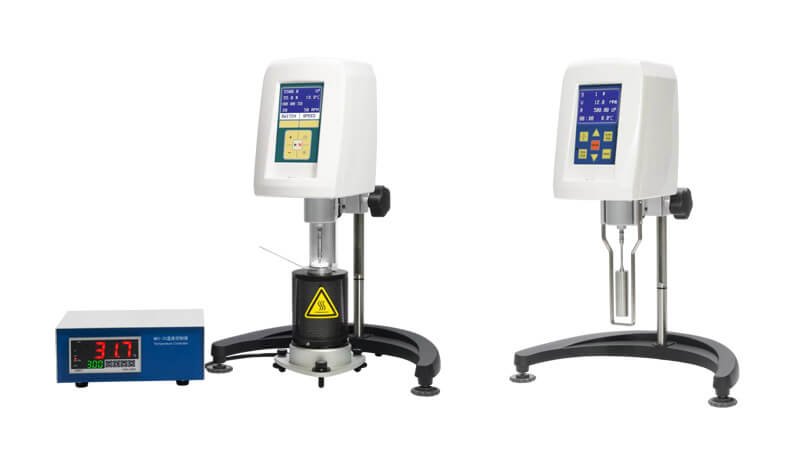
Getting reliable data from a rotational viscometer is easy if you follow a few simple rules. Many of the problems my customers face are not from a broken instrument but from small errors in their process. Here are the most important tips I share with every client.
Control the Temperature
This is the number one rule. A small change in temperature can cause a big change in viscosity. Use a circulating water bath to keep your sample at a precise temperature, for example, 25.0°C. Always report the temperature with your viscosity reading.
Be Consistent
Your setup should be the same for every test.
- Container: Use the same size and shape of beaker.
- Volume: Use the exact same amount of liquid.
- Spindle Depth: Make sure the spindle is immersed to the same depth mark every time.
Avoid Common Mistakes
A few small things can ruin a good measurement. The table below shows some common errors and how to fix them.
| Mistake | Why It's a Problem | The Solution |
|---|---|---|
| Air Bubbles | Bubbles cause the spindle to spin in air, not liquid, giving a false low reading. | Pour the sample gently down the side of the beaker. Let it sit for a few minutes for bubbles to rise. |
| Wrong Spindle/Speed | This gives a torque reading outside the ideal 10-100% range, making the data inaccurate. | Do a quick test to find a combination that gives a torque reading around 50%. |
| Reading Too Soon | The reading needs time to stabilize as the fluid adjusts to the spindle's rotation. | Wait at least 30-60 seconds, or until the displayed value stops changing, before you record the number. |
Conclusion
Seeing viscosity is the first step. Measuring it accurately is the next. Mastering this property will improve your products and processes, turning theory into better, more consistent real-world results.